·
3 minute read
·
3 minute read
If you’re a program manager running a scholarship, grant, or award program, you need software that is easy to work with, and simple to set up. In this post, we’re walking you through 5 steps to get started with SmarterSelect, so you go live in less than 24 hours and streamline how you choose the best candidates for your program.
1. Create a Free Account
To get started, first contact sales to spin up your free account. We add features to your account depending on the plan you decide to go with, and any work you do during your free trial won’t go away. So we encourage you to set up your free trial as if you were actually launching your scholarship program with us. This way you get to know all the features you’re looking for.
We’re betting by the time you get to the end of this walkthrough you’ll see why more than 40,000 programs have been created using SmarterSelect for their application submission programs.
2. Create Your First Program
The plan you choose when signing up for your free trial will determine which features are available when you create your program. The basic plan has our standard features, whereas our higher-tiered plans include additional features such as Matching, Autoscore, Calculation, App Rules, and more.
To create your first program all you have to do is follow our walkthrough wizard, it will guide you through the entire process. It’s also worth noting that you can always create a new program by going to the top menu bar, and clicking Programs > Create New Program.
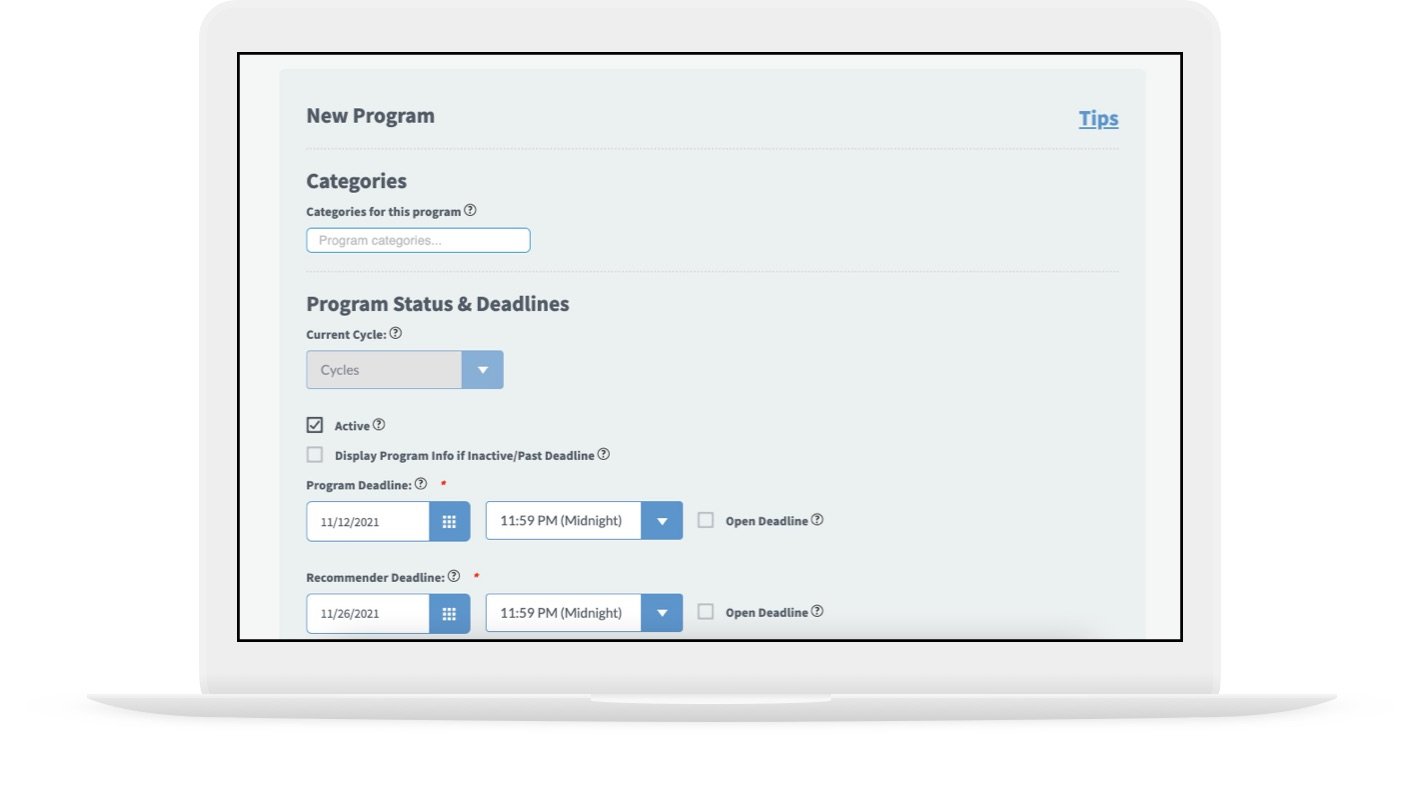
When you create your program, you will have to fill in details like your:
- Program name
- Program description
- Application deadline
- Evaluator deadline
- Contact information, and a few more
This will serve as a starting point, but you can always come back to these details in the future and make changes.
Once you have your first program created you can move on to the next step, creating your first application form.
3. Build The Application Form
This is where the magic starts happening. In this step, you’ll create the actual application form that applicants will be able to view and fill out for your program.
Not sure what to add to your application? No problem! Not only do we have application templates that you can use for inspiration, but you can also speak to other program managers in our forum to ask them for tips and ideas for the best questions to include in your form.
If that wasn't easy enough, we also have a Program Library that you can browse with hundreds of application forms that have already been created. You can simply duplicate these, and with some minor changes, adapt them to your organization.
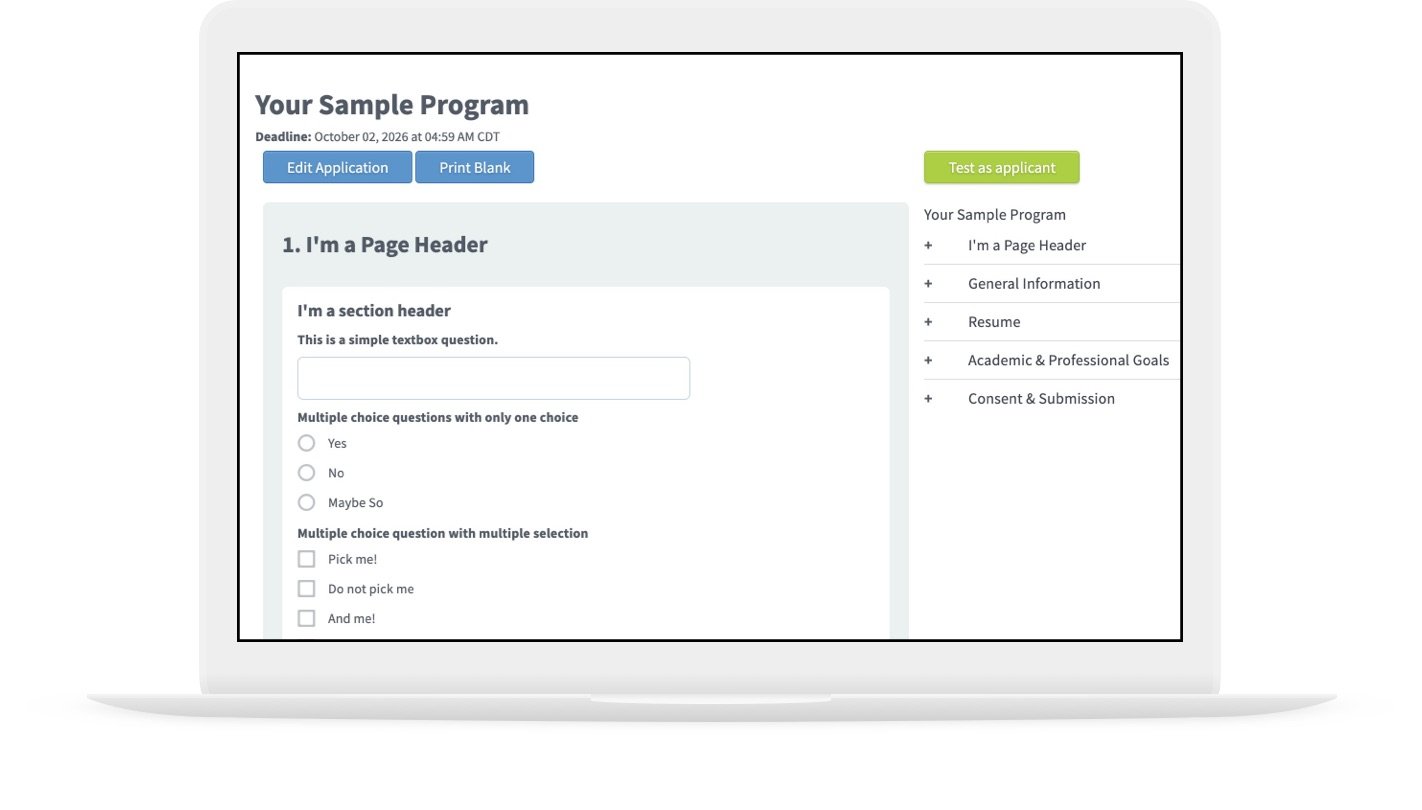
Whether you’re creating an application for scholarships, an award, or you’re in a nonprofit program that's giving grants to a worthy cause, you’re sure to find all the help you need to create your application form in less than 24 hours.
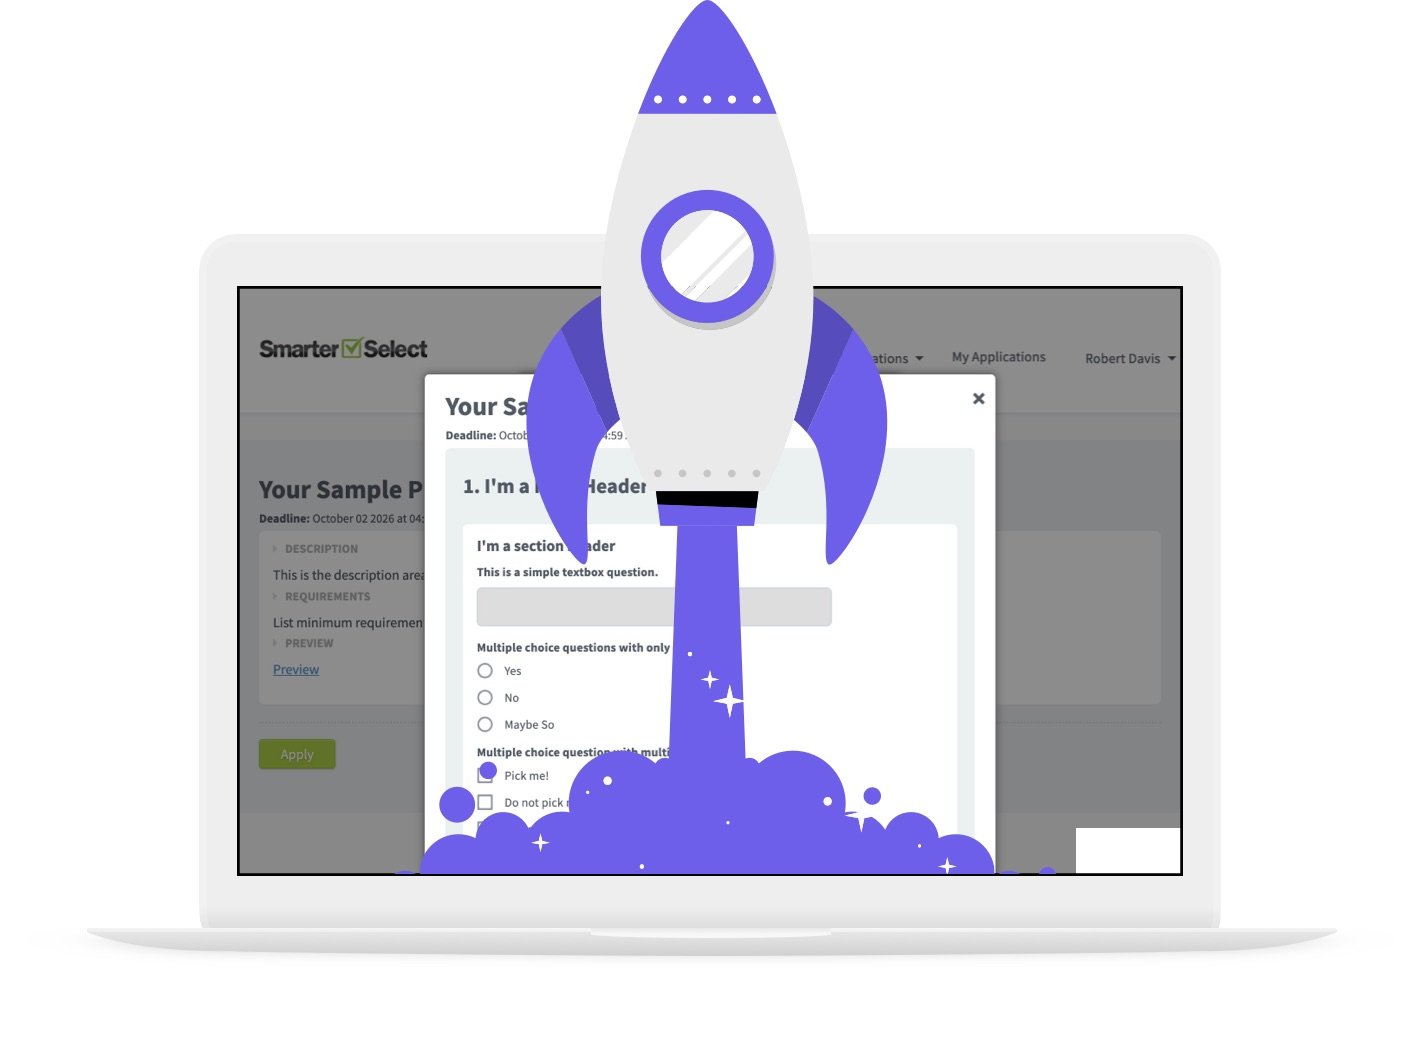
4. Test it Out
After you build your application form, you can test it to make sure it’s easy to understand and navigate for your applicants.
We recommend this step for every program manager because until you walk through your own application, you won’t know what kind of questions to expect from your applicants. And, by doing this you might be able to offset common questions by adding tips and suggestions or even prevent troubleshooting altogether.
Go through your application as if you’re a real applicant, and look at how it will appear when it’s live. In just a few clicks, you will know if things are set up the way you want them to be, and quickly make changes if necessary.
Bonus tip: You can also test your applications as if you were an evaluator to verify that everything will be correct on their end.
5. It’s Time to Go Live!
After testing and tweaking, you’ll be ready for your application and program to go live. We recommend moving to a paid account before sharing this link. However, once your application is ready, you can take the web link and add it to your email campaigns, embed it into your website, or distribute it any other way you choose to.
What If You Have More Questions About Launching Your Program?
We want every program manager to succeed. That is why we have created training videos for all of our customers and their teams of evaluators and administrative assistants. We also have a full library of templates to choose from that you can use to quickly build new application forms, scoring rubrics, acceptance/rejection letters, and more.
Additionally, if you need assistance with any aspect of your applications or evaluations, we built the SmarterSelect Help Center that customers can use to learn more about frequently asked questions, account settings, programs, applications, and any of our features.
Within our help center, we’ve also included recordings of our past Q&A webinars that provide a visual walkthrough of the various features available in our software. And, if you don’t see an article that addresses what you’re looking for you can either visit our community forums to interact with fellow program managers or create a support ticket to chat directly with a SmarterSelect team member.
It’s never been easier to run a scholarship, grant, or application program. What are you waiting for? Click here to get start your free trial, today!